How to Set Up a Shopify Store With Claude Code (Ready for Automation)

This guide is part of a series on building an automated ecommerce store that runs on n8n workflows, with you making the calls that matter from Slack. If you’ve followed my two previous guides, you’ll now have an ecommerce niche and a brand, both worked out with AI, and all you need to do now is set up the store.
Most guides on how to set up a Shopify store have you clicking through the admin and setting everything up by hand. This guide hands that setup to Claude Code instead. We’ll also set the store up so the n8n workflows later in the series can plug straight in, which mostly comes down to naming product types consistently and giving n8n an app with the right access. By the end of this guide, you’ll have a store Claude set up with you, taking payments, with tax, shipping and policies done, a few core categories, suppliers with a feed, API access n8n can use, and a free theme styled to your brand.
What you’ll end up with
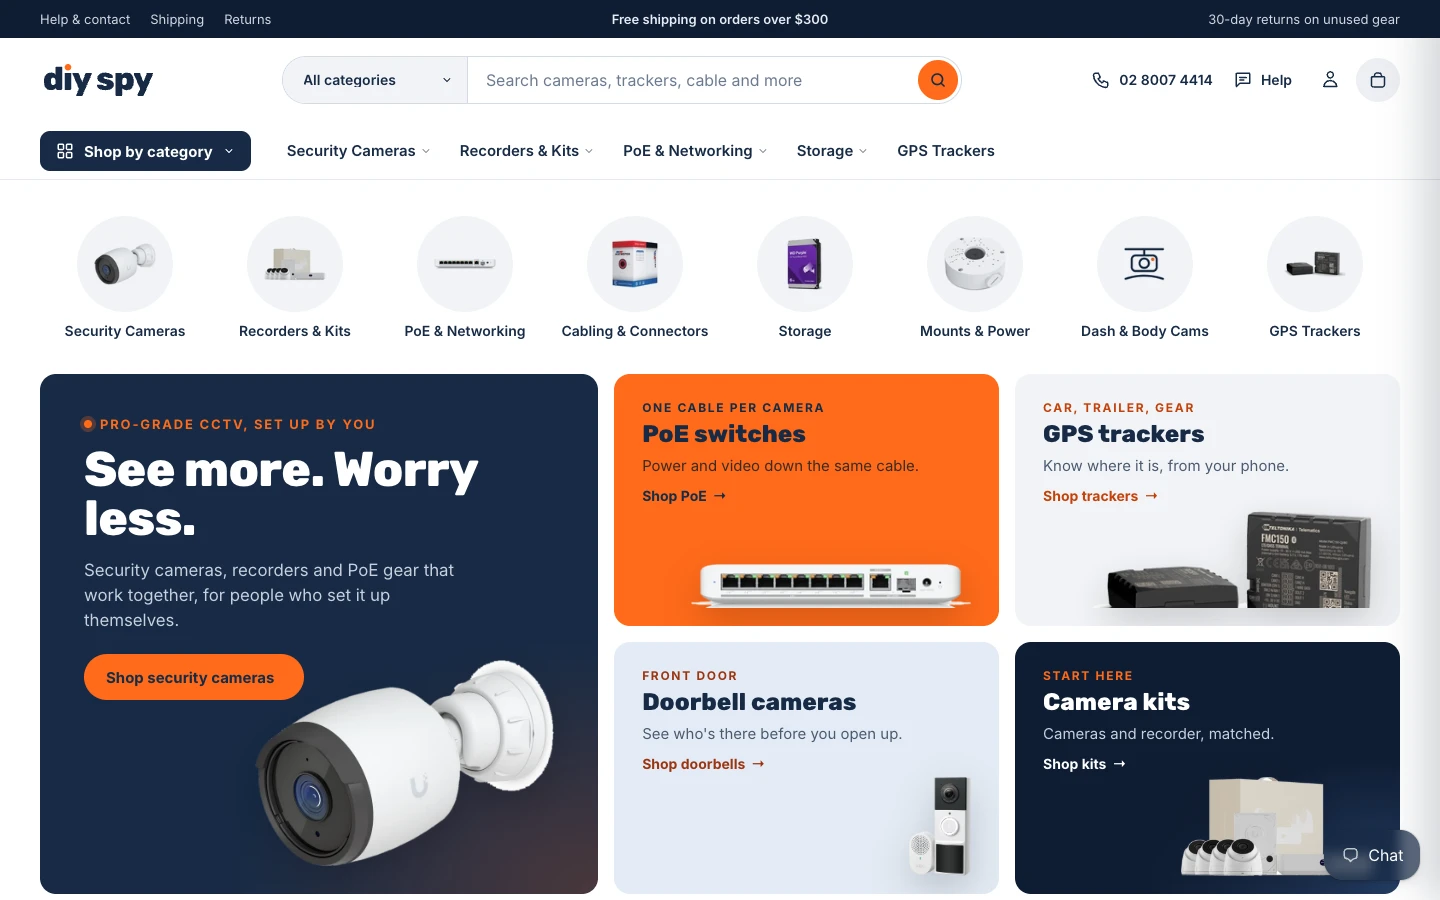
For this guide, I set up a brand new store called DIY Spy (diyspy.com.au), and it’s my running example throughout. It’s an Australian store selling prosumer security cameras, GPS trackers and accessories. The trick is to put your core decisions in one brief file up front, so Claude works from the same decisions every time and every workflow you build later has clean foundations to rely on.
When you build a Shopify store with AI this way, Claude Code handles the repetitive configuration and theme files, while you make the commercial decisions and approve each step. Here’s the finished DIY Spy homepage, then the full setup checklist with who handles each area and why it matters later:
| Area | Who does it | What gets set | Why it matters later |
|---|---|---|---|
| Platform | You | Shopify account, store creation and plan selection | Gives Claude the Admin GraphQL API and CLI so your store is reachable by code |
| Core settings | Claude | Store name, currency, time zone, weight unit, order prefix | Sets the base units, schedule clock and permanent store address every workflow relies on |
| Payments | You, then Claude | You verify identity and bank details; Claude sets wallets and capture method | Capturing on fulfilment or manually means you only take the money once the stock’s confirmed |
| Tax | You, then Claude | You enter tax registrations; Claude sets whether prices include tax | Decides how every price written by a supplier pricing workflow is interpreted at checkout |
| Shipping | Claude, you save | Domestic shipping zone, flat standard rate, free threshold, weight-based express bands | Gives product import workflows a clear rule for how product weights affect freight charges |
| Policies and pages | Claude drafts, you approve | Five store policies plus About, Contact, Shipping and returns, and FAQ pages | Meets the trust and policy checks that Google Merchant Center runs before showing your products |
| Categories | Claude | Two-level smart collection tree driven by exact product types, plus main and footer menus | Lets product creation workflows drop new items into the right collections automatically by setting one field |
| Suppliers | You choose, Claude checks the feed | Feed structure check across SKUs, identifiers, stock, weight, images and specs | Confirms a distributor’s data can run unattended before you spend time building an import workflow |
| API access | Claude builds, you install and copy the secret | Dev Dashboard app with read and write scopes for products, stock, content and metaobjects | Gives n8n a single credential with the permissions required across the later automation guides |
| Theme | Claude builds, you pick and approve | Free Horizon theme styled to your brand kit in prefixed files on an unpublished copy | Produces a clean storefront that updates safely without breaking custom sections or needing a licence |
What you need
Before you open your terminal, I’m going to assume you’ve identified your niche and products and built out some sort of brand kit (logo files, colours, fonts and a line or two on your voice). If not, I highly recommend following my guides on finding a profitable ecommerce niche and building your brand first. You’re also going to need:
- A Shopify account on a plan (3 days free, then US$1 a month for 3 months)
- A domain name
- Claude Code (included in Claude Pro at US$20 a month)
- The Shopify CLI
- Claude in Chrome, for the admin screens the API can’t reach
Step 1: Set up Claude Code to work on your store
This step connects Claude Code to your store and sets one working rule: Claude never guesses a setting or writes a change without your OK. First, create the store yourself at shopify.com, because account creation and billing belong in your own browser session.
Write your store brief in CLAUDE.md
Make a project folder on your computer with a brand/ subfolder for your logo files, colours, fonts and voice.md, then save your store brief as CLAUDE.md in the root folder. Claude Code reads CLAUDE.md at the start of every session, so you write your decisions down once and every prompt after that works from them. Create CLAUDE.md with this file:
# Store brief

## The store
- Name: <store name>
- Sells: <one line on the niche>
- Country and currency: <country>, <currency>
- Store address for integrations: <your-store>.myshopify.com

## Brand
- Brand kit: ./brand/ (logo files, colours, fonts, voice.md)

## Categories (two levels, product type = the leaf name)
- <Category>
  - <Sub-category>
  - <Sub-category>
- <Category>

## Suppliers
- <Supplier>: <CSV, XML or API>, <how often it updates>

## Settings decided
- Prices include tax: <yes or no>
- Capture payments: <automatically, or manually after checking stock>
- Shipping: <flat rate> standard, free over <threshold>
- Returns: <days> days, <who pays return postage>

## How we work
- Read this file before every task.
- Use the Shopify CLI for Admin API reads and changes. Run mutations only with --allow-mutations, and only after I've approved the change.
- Before any change, show me the current value, the new value and the exact command, mutation or screen you'll use.
- Use the browser for admin screens the API doesn't cover, and stop before any Save so I can check.
- Never ask me to paste a password, client secret or token into this chat.
The rules under How we work are what keep you in control. Claude reads the brief first, shows you the current value, the new value and the exact change, and only then changes one area at a time once you say yes. It reaches your store in two ways: the Shopify CLI’s store commands for Admin GraphQL queries and changes, and Claude in Chrome for the admin screens the API doesn’t cover, like Settings > General, parts of Payments and settings inside apps.
Install the Shopify CLI
The Shopify CLI needs Node.js 22.12 or higher, and installs with npm:
npm install -g @shopify/cli@latestConnect the Shopify CLI to your store
Give the Shopify CLI access to your store with shopify store auth using the scopes this guide relies on:
shopify store auth --store your-store.myshopify.com --scopes read_products,write_products,read_inventory,write_inventory,read_locations,read_content,write_content,read_online_store_navigation,write_online_store_navigation,read_publications,write_publications,read_themes,write_themesThe Shopify CLI opens a browser for you to approve the access, then stores a token on your computer for later commands. If the token expires or you need another scope, just run it again.
Install the Shopify AI Toolkit
Install the Shopify AI Toolkit plugin for Claude Code, so Claude reads Shopify’s current docs and API schemas and checks the GraphQL and Liquid it writes, rather than guessing from what it remembers:
claude plugin install shopify-ai-toolkit@claude-plugins-officialIf you’d rather use MCP, Shopify’s Dev MCP server does a similar job: claude mcp add --transport stdio shopify-dev-mcp -- npx -y @shopify/dev-mcp@latest.
Check the Shopify CLI connection
Test the connection with a read-only query using shopify store execute:
shopify store execute --store your-store.myshopify.com --query 'query { shop { name currencyCode ianaTimezone weightUnit taxesIncluded orderNumberFormatPrefix } }'Here’s the real reply from DIY Spy:
{
  "shop": {
    "name": "DIY Spy",
    "currencyCode": "AUD",
    "ianaTimezone": "Australia/Sydney",
    "weightUnit": "KILOGRAMS",
    "taxesIncluded": true,
    "orderNumberFormatPrefix": "DS-"
  }
}
Without --allow-mutations, shopify store execute refuses any mutation, which is why it’s safe to let Claude run reads on its own.
Step 2: Set your core settings
This step sets the base units, the clock your workflows run on, your order numbering and the permanent store address everything later depends on. Give Claude this prompt:
Read CLAUDE.md. Check the store's core settings with a read-only query: name, currency, time zone, weight unit, whether prices include tax and the order number prefix. Show me a table with the current value and the value from the brief. For anything that differs, tell me whether you can change it through the API or need the admin screen, and wait for my OK before changing anything.Claude reads the current values through the CLI and shows them against the brief in a comparison table. On DIY Spy everything already matched, so Claude’s reply was the table and nothing to change:
| Setting             | Current           | Brief     |
|---------------------|-------------------|-----------|
| Name                | DIY Spy           | DIY Spy   |
| Currency            | AUD               | AUD       |
| Time zone           | Australia/Sydney  | Sydney    |
| Weight unit         | Kilograms         | Kilograms |
| Prices include tax  | Yes               | Yes       |
| Order number prefix | DS-               | DS-       |

Everything matches the brief, so there's nothing to change.
When something does differ, Claude makes the change in the browser wherever the API can’t reach, which is mostly Settings > General. Once it’s filled in the screen and paused, check Settings > General yourself before you save:
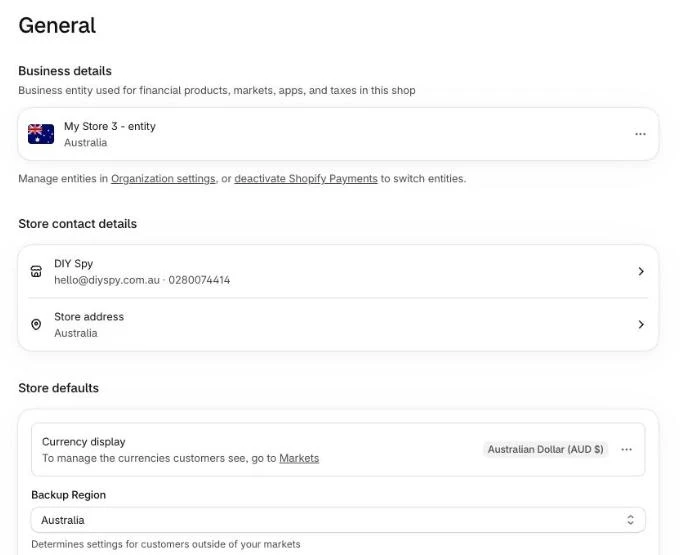
Five of these matter for the automation later on:
- Store currency: You can change store currency after the first sale, but it has knock-on effects across your prices and reports, so get it right now.
- Time zone: Your scheduled n8n workflows, stock syncs and reports all run on this clock.
- Weight unit: Shipping rate bands and supplier feeds need to use the same unit, otherwise the freight maths goes wrong.
- Order number prefix: A short prefix identifies the store on invoices and bank statements, so DIY Spy’s orders read
DS-1001. - Permanent
.myshopify.comaddress: Keep youryour-store.myshopify.comaddress inCLAUDE.md, because API calls and n8n integrations use it rather than your own domain.
Claude can also give you the DNS records to add at your domain host to connect your own domain under Settings > Domains. Leave the store set to Private, with its password page, until you’re ready to launch.
Step 3: Set up payments and tax (mostly yours)
Identity checks, bank payouts and tax registration are yours, so start there. In Settings > Payments, activate Shopify Payments with your identity and bank details (it’s available in these countries), and register for tax under Settings > Taxes and duties where you need to.
Once your accounts are verified, have Claude set the three settings that sit around them:
| Setting | Value | Screen |
|---|---|---|
| Accelerated wallets (Shop Pay, Apple Pay, Google Pay) | On | Settings > Payments |
| Payment capture method | Automatically at checkout, Automatically when the entire order is fulfilled, or Manually | Settings > Payments |
| Whether prices include tax | Match your brief | Settings > Taxes and duties |
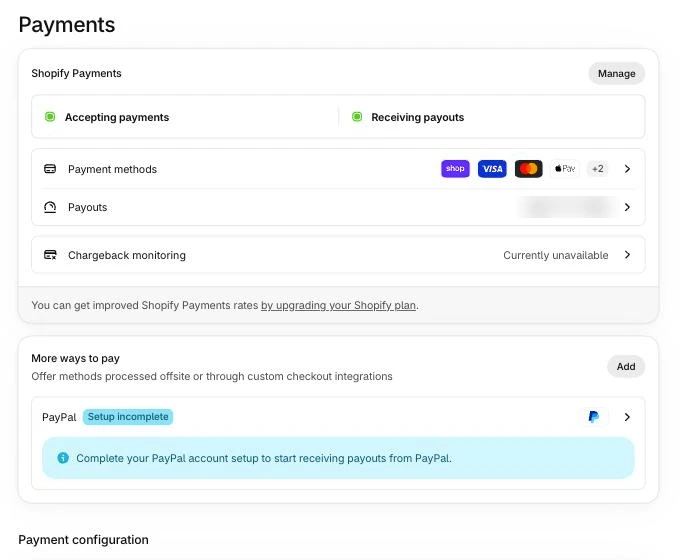
Tip: If you dropship or sell from a supplier’s stock, don’t capture payment at checkout. Choose Automatically when the entire order is fulfilled, so you only take the money once the order’s actually on its way, or Manually if you’d rather confirm stock first. I capture manually on DIY Spy, because distributor stock can move between feed runs. Either way, an authorisation lasts 7 days, and capturing after that costs an extra 1.75% on top of card fees.
Whether prices include tax decides how every price a workflow writes is read at checkout, so settle that one before you build any pricing automation. Check Settings > Payments and Settings > Taxes and duties once Claude’s staged them:
Step 4: Set up shipping
Your shipping rules decide how checkout works out freight, and they’re also why product weight becomes a must-have field in your supplier feeds. One domestic zone with a flat standard rate plus free shipping over a threshold is easy for shoppers to understand and easy to automate around. Give Claude this prompt:
Read CLAUDE.md. Set up shipping for <country> only: one zone, standard at <flat rate>, free on orders of <threshold> or more, and express priced by weight: <band and price list>. Show me the rates as a table first. Then set them up in Settings > Shipping and delivery and stop before Save so I can check them.Claude lays the rates out as a table first, so you can check the thresholds and weight bands before anything touches the admin. On DIY Spy it looks like this:
| Rate | Rule | DIY Spy price |
|---|---|---|
| Standard | Orders under A$300 | A$20 flat Australia-wide |
| Free standard | Orders of A$300 or more | Free |
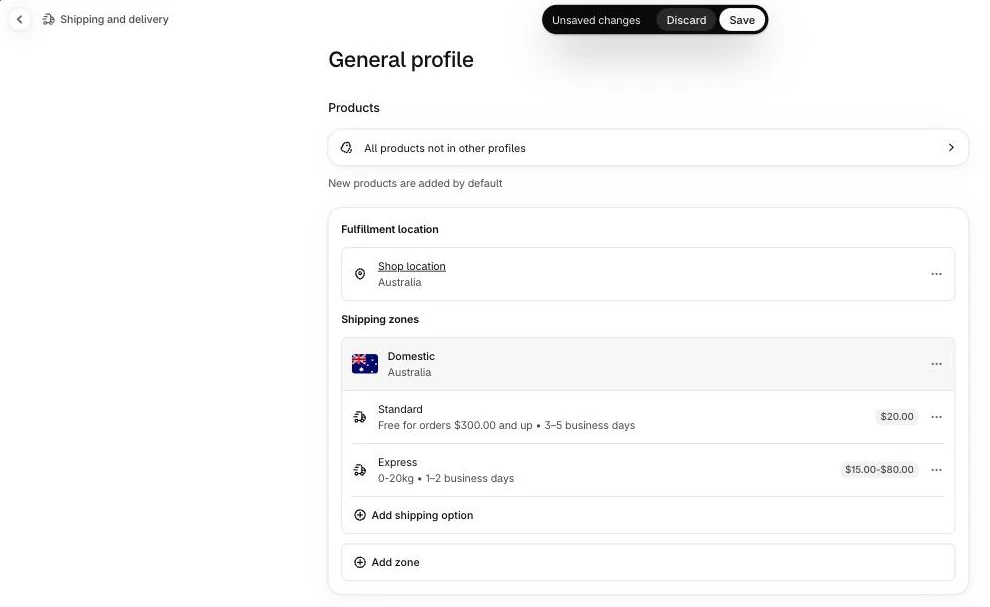
| Express (by weight) | 0 to 1 kg up to 10 to 20 kg | A$15 up to 1 kg, rising to A$80 for 10 to 20 kg |
Weight-based express rates need a real weight on every product, otherwise everything lands in the lightest band at checkout, which is why weight is one of the fields to ask suppliers for in Step 7. Once you approve the table, Claude opens Settings > Shipping and delivery in the browser and stages the rates. Honestly, some screens still need a person: on DIY Spy, Claude staged the rates, and I checked them and pressed Save myself.
Step 5: Draft policies and core pages
It’s worth getting your policies and core pages up before you load any products, because the sales channels check for them. Google Merchant Center checks your site for contact details and a clear return and refund policy (or a clear statement that you don’t take returns), and free listings from a store without them get limited visibility. Give Claude this prompt:
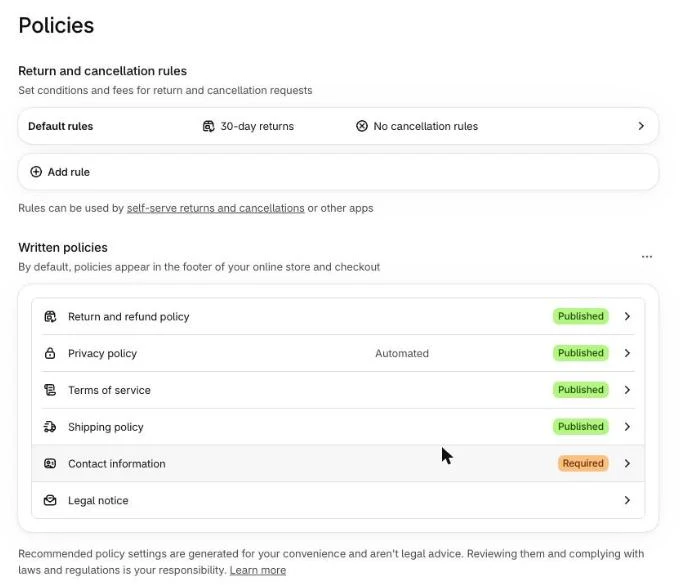
Read CLAUDE.md. Draft the refund, privacy, terms of service, shipping and contact policies, starting from Shopify's templates and changing them to match the brief: <return window>, <who pays return postage>, the shipping rates we set, and our contact details. Keep it plain and short. Then draft About, Contact, Shipping and returns, and FAQ pages in our voice from ./brand/voice.md. Show me each one before you publish it.Claude starts from Shopify’s policy templates and edits them with the details from your brief, then drafts the About, Contact, Shipping and returns, and FAQ pages in your voice. Read each draft before Claude saves it to Settings > Policies or Online Store > Pages. One thing to keep in mind here: only sell what’s legal to sell where you are and allowed under Shopify’s Acceptable Use Policy, and keep compliance copy to what actually covers you. Then check Settings > Policies to make sure everything’s published without template placeholders:
Step 6: Build a few core categories
Start with a few core categories from your brief: only what fits the niche and what your first suppliers can actually fill, two levels deep at most. How you name product types here is the single biggest decision for automating the catalogue later. Give Claude this prompt:
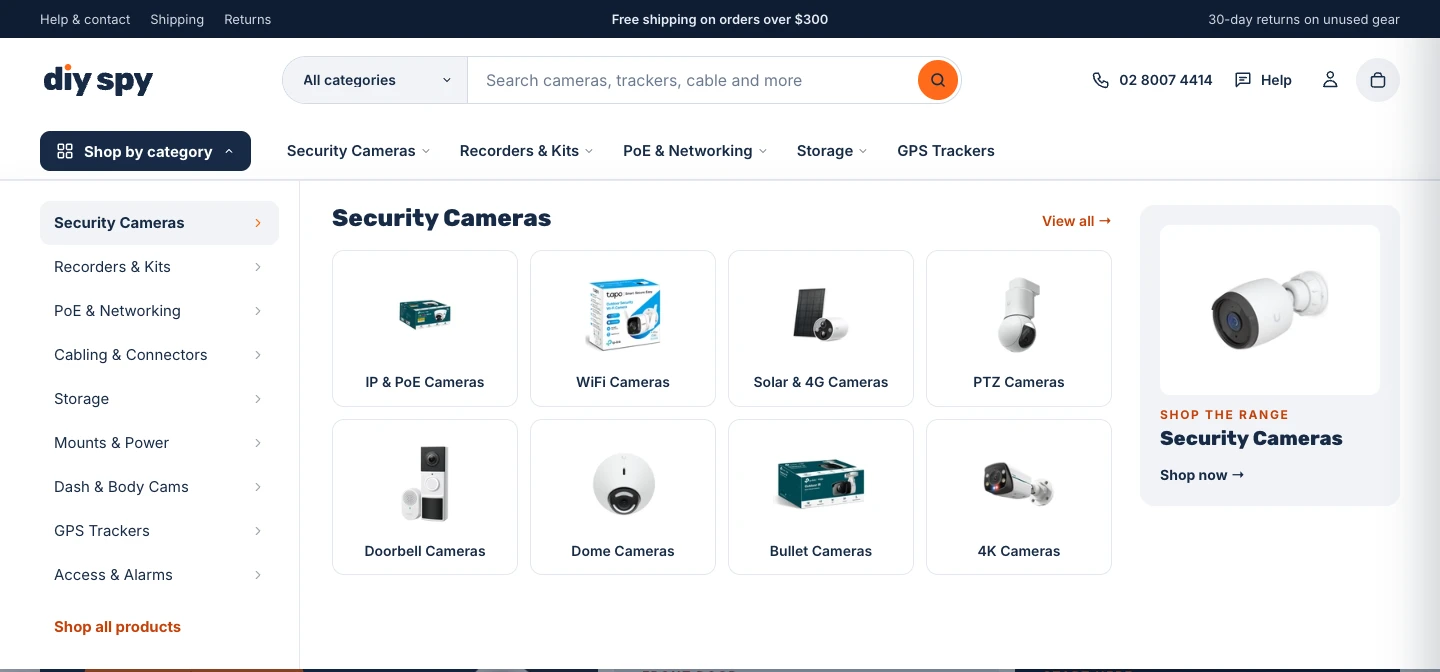
Read CLAUDE.md. For each category in the brief, create a smart collection. Leaf categories use one condition: Product type is equal to the leaf name, spelt exactly as in the brief. Parent categories match any condition, one per child's product type. Then build the main menu from the tree (two levels) and a footer menu with Shop and Help links. Show me the list of collections, handles and conditions before you create anything.Here’s why it works. Each leaf category’s product type is named exactly the same as the category, and each leaf collection is a smart collection with the condition “Product type is equal to” that name. Each parent collection is a smart collection too, listing every child’s product type with “any condition” selected. So when a workflow creates a product and sets its product type to a leaf name, the product lands in both the leaf and the parent collection without anyone touching it. DIY Spy’s whole category tree works this way across 42 collections, with product types like PoE Switches and GPS Trackers.
Tip: Keep the exact list of leaf product types in
CLAUDE.mdso every future prompt and n8n workflow maps products against the exact same spelling.
Have Claude give each leaf collection a standard product category from Shopify’s product taxonomy as well, because channels like Google and Facebook work from standard categories and Shopify uses them for tax rules. Once you approve the list of handles and conditions, Claude creates the collections and builds the menus through the Shopify CLI. Check Products > Collections and Content > Menus to make sure the tree’s right:
Storefront filters and custom metafields come later, once products exist and carry real values (that’s the product data enrichment guide), and further collections come from search demand once the store’s running (the collections SEO guide).
Step 7: Check suppliers with a feed
Automation depends on suppliers with a real data feed: a CSV or XML file delivered on a schedule, or an API you can query. A PDF price list or a dealer portal you copy from by hand isn’t a feed. When you talk to suppliers, ask whether their terms let you import their feed into your own store, and check their data includes SKU, brand, GTIN, MPN, cost, stock, weight, images and specs.
Before you commit to a supplier, drop a sample file into ./feeds/ and give Claude this prompt:
Here's a sample of <supplier>'s feed: ./feeds/<file>. Tell me which fields it has, and for each of SKU, brand, GTIN, MPN, cost, stock, weight, images and specs, how many rows have a value. Open 20 image URLs and tell me their sizes. Then tell me which of our categories in CLAUDE.md the products would fall into, and anything that would stop us importing it automatically.Claude reports how complete each field is, checks the image URLs actually load at a usable size rather than tiny thumbnails or login walls, and maps the products against your categories. In my case, DIY Spy started with two distributor feeds (one an XML file, one an API), plus a CSV for anything bought direct. Once you’ve got a clean sample, the add products to Shopify automatically guide turns those feeds into Shopify drafts, and it covers marketplaces such as AliExpress too.
Step 8: Give n8n access to your store
Your n8n workflows need an app with the right Admin API permissions to read and write store data. Since 1 January 2026, you can’t create new custom apps in the Shopify admin. Existing ones keep working, but new ones are made in the Shopify Dev Dashboard (dev.shopify.com), and they don’t show a permanent admin token like the old ones did. This setup matches the template repository’s setup page, so the free n8n templates work without any scope changes. Give Claude this prompt:
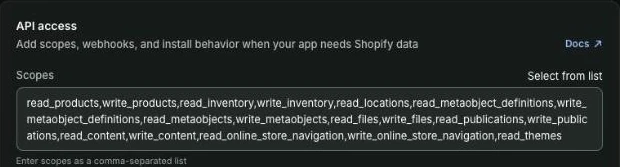
Read CLAUDE.md. In the browser, open the Shopify Dev Dashboard and create an app called "<store> n8n" with these Admin API scopes: <the scopes from the table>. Release a version, then stop and tell me where to approve the install on the store. Don't open or copy the client secret; I'll copy it myself.Use these Admin API scopes (read and write unless noted):
| Scope | What it covers |
|---|---|
read_products, write_products | Products, variants, collections, product metafields |
read_inventory, write_inventory | Stock levels |
read_locations (read only) | The location IDs stock is written against |
read_metaobject_definitions, write_metaobject_definitions | Custom content types such as brands, FAQs and product groups |
read_metaobjects, write_metaobjects | Entries of those types |
read_files, write_files | Images and documents in Shopify Files |
read_publications, write_publications | Publishing to the Online Store and other sales channels |
read_content, write_content | Pages, blogs and articles |
read_online_store_navigation, write_online_store_navigation | Menus and redirects |
read_themes (read only) | Checking the live theme |
Put all of these in on day one. An app missing a read scope blocks simple checks later, and adding one means releasing a new version and approving it again. Orders, customers and fulfilment scopes can wait until a workflow needs them.
Claude creates the app in the Dev Dashboard in the browser (or walks you through it), adds the scopes, releases a version and pauses so you can approve the install on your store. Before you install, check that the app and the store belong to the same Shopify organisation, otherwise the token request gets refused:
To connect the app to n8n, the templates use the client credentials grant: n8n fetches a token at the start of each run using the app’s client ID and secret, and that token lasts 24 hours. The upside is that scope changes apply on the next token, with nothing to reconnect. Create a Custom Auth credential in n8n with this JSON:
{"body": {"client_id": "<your client ID>", "client_secret": "<your client secret>"}}Tip: Copy the client secret straight from the Dev Dashboard into your password manager and n8n yourself, so it never passes through the chat.
Always use the permanent your-store.myshopify.com address in the token request rather than your own domain, then test the credential by running one token fetch and a read query for the shop name. If you already have an Admin API access token from a custom app made before 2026, you can skip the token request and send that token in a Header Auth credential instead.
Step 9: Style a free theme with Claude
Start from Horizon
I start with Horizon, which is Shopify’s own free theme. It already ships with the sections and collection filtering a catalogue store needs, so Claude gets a reliable foundation to restyle instead of having to code a theme from the ground up.
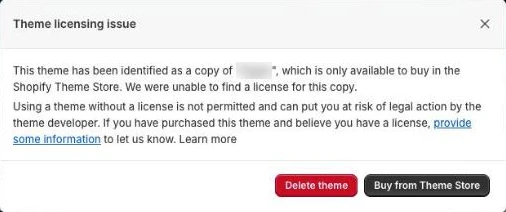
Coming over from WooCommerce, I was used to buying a good theme once and rolling it out across as many sites as I wanted. The catch is that Shopify ties a theme to one store, because a theme licence covers one store. When I tried uploading the theme from my first store onto DIY Spy, Shopify flagged and locked it straight away, which means you can’t customise or publish it:
Gather inspiration
Honestly, you don’t need anyone else’s theme files to end up with a store that looks the part. If you pull together a few stores and page designs you like, Claude can build that same feel right on top of Horizon. Here’s where I usually look when I’m pulling references together:
- Competitors and the bigger retailers in your niche, because they’ve already figured out how your buyers browse, from the way their collection filters work through to what sits beside the add to cart button.
- Shopify’s store examples alongside the demos in the Shopify Theme Store, which show you practical layouts that already run on Shopify.
- Baymard Institute and Nielsen Norman Group, since both have annotated UX research showing what works on product and category pages as well as during checkout.
- Awwwards or Behance when I want broader layout inspiration, plus Pinterest for narrowing down typography and colour ideas.
Drop your screenshots and URLs into a references/ folder, and jot down a quick line explaining what you want to borrow from each one. A specific note like “the mega menu shows sub-categories as image cards” gives Claude something concrete to build, whereas a raw URL leaves it guessing.
Have Claude build it
Grab Horizon from the Theme Store if it isn’t installed yet, then point Claude at your references/ folder, your brand kit in ./brand/, the categories you set up in Step 6 and a handful of real products. Claude handles the heavy lifting through the Shopify CLI theme commands:
shopify theme list --store your-store.myshopify.com
shopify theme duplicate --theme <live theme id> --name "Horizon draft" --force --store your-store.myshopify.com
shopify theme pull --theme "Horizon draft" --store your-store.myshopify.com
shopify theme push --theme "Horizon draft" --store your-store.myshopify.com
shopify theme open --theme "Horizon draft" --store your-store.myshopify.com
One nice safety net here is that shopify theme push won’t touch your live theme unless you explicitly pass --allow-live, so Claude can’t accidentally push a half-baked draft to your live store. Once your draft theme is pulled down, give Claude this theme brief prompt:
Read CLAUDE.md and the brand kit in ./brand/. We're styling Shopify's free Horizon theme for this store.

References for look and layout only, never their code: ./references/ (screenshots and URLs, with my notes on what I like about each).

What matters most:
- Header: logo, a prominent search bar, and a mega menu built from the main menu.
- Homepage: a hero, category tiles, a new-in product row, a trust row (shipping, returns, payment) and brand logos.
- Collection pages: title, a short intro, filters in a sidebar, product cards with brand and price.
- Product pages: gallery, price and stock, key points, add to cart, a trust box and a specifications table.
- Footer: newsletter signup, shop and help links, contact, policies and payment icons.
- One container width on every page, a white page background, and buttons that look the same everywhere.

How to work:
1. Duplicate the live theme and pull the copy with the Shopify CLI. Never push to the live theme.
2. Put new code in new sections and snippets prefixed <prefix>-. If you have to edit a Horizon file, list it in THEME-CHANGES.md.
3. Build two different looks first and send me the preview links. I'll pick one, then we'll refine it in rounds.
4. Check every change at 1440, 1024, 768 and 375 px wide before you show me.
I like getting Claude to mock up two distinct looks first, because it’s much easier to react to real pages in a browser than to debate design details in the abstract. In my case on DIY Spy, both of Claude’s first looks came back with a navy header, though one opened with category tiles while the other went with a full-width hero:
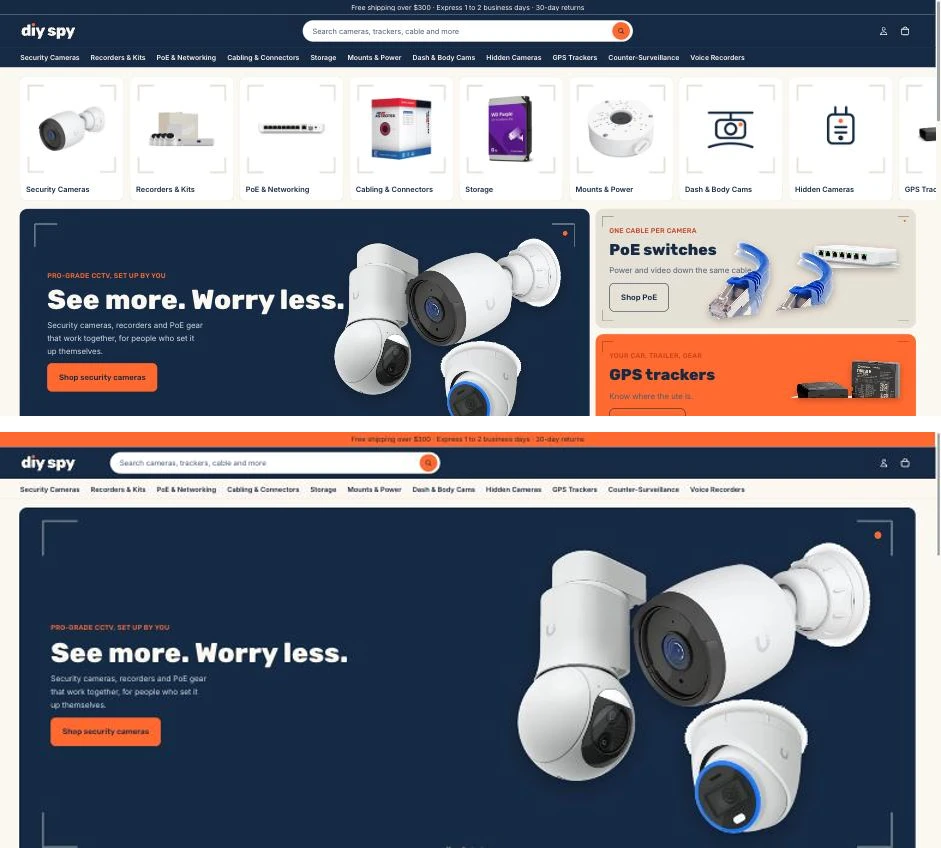
That first pass gave me plenty to push back on, because the layout felt too wide and had cream backgrounds everywhere, while the header and menu ran straight into each other. I fed those notes back, and the next round landed with a white background, a single container width across every page, a cleaner mega menu and three header options to choose from, which is where I settled on the white header. Once the homepage direction was locked in, we worked through the collection and product pages before tidying up the remaining inner pages.
Tip: Tell Claude to keep its custom code inside prefixed sections and snippets, and to record any direct edits to stock Horizon files in
THEME-CHANGES.md, because future theme updates overwrite the stock files.
Before you go live, open the draft preview and check how everything stacks at phone, tablet and desktop widths, then publish from Online Store > Themes or by running shopify theme publish.
Before you launch
Once real products are in, install the free Google & YouTube and Facebook & Instagram sales channel apps. Check the Google & YouTube channel requirements, and my Google Shopping feed optimisation guide covers getting your listings approved. When you’re ready for customers, open Online Store, click the Private lock, choose Public and click Update to take the password page down.
What it costs
Most of what this guide uses is free, so your money goes on the essentials. Here’s what each piece costs in the US (prices differ by country, so check yours on Shopify’s pricing page before you sign up):
| Piece | Cost (US, checked 20 November 2026) |
|---|---|
| Shopify Basic | 3 days free, then US$1 a month for 3 months; then US$39 a month, or US$29 a month billed yearly |
| Horizon theme | Free |
| Apps used in this guide (Search & Discovery, Google & YouTube, Facebook & Instagram) | Free |
| Domain | Whatever your registrar charges |
| Claude Code | Included in Claude Pro, US$20 a month (US$17 billed yearly) |
| Shopify CLI, Shopify AI Toolkit | Free |
That leaves the Shopify plan, the domain and Claude as your only ongoing costs. If you hit Claude Pro’s usage limits during heavy theme work, the Max plans start at US$100 a month.
Common mistakes
Letting Claude change things without showing you first
If Claude runs a mutation or clicks Save without showing you the change first, one misread prompt can overwrite a setting. That’s why the rule to show the current value, the new value and the exact command lives in CLAUDE.md, and why you give your OK each time.
Pasting secrets into the chat
Pasting a client secret, password or bank number into a prompt leaves live credentials sitting in your chat history and local logs. Copy the Dev Dashboard client secret straight into your password manager and n8n yourself, so it never enters the chat.
Typing product types freehand
Typing product types by hand breaks smart collection matching, because “Product type is equal to” needs an exact match, character for character. Keep your leaf category names in CLAUDE.md and have every workflow pick product types from that list.
An API app missing the read scopes you’ll need later
An app without the read scopes blocks simple checks later, and fixing it means releasing and approving a new app version mid-project. Add every scope from Step 8’s table when you first create the app.
Reusing a theme from another store
Coming from WooCommerce, it’s tempting to reuse a theme you already own, but a Shopify theme licence covers one store, so an uploaded copy gets locked. Build on Horizon and use other stores for inspiration instead.
Editing the live theme instead of an unpublished copy
Pushing code straight to your live theme shows half-finished layouts and broken sections to visitors straight away. Duplicate the theme with shopify theme duplicate and let Claude push only to the draft copy, without --allow-live.
Make it your own
Staying on WooCommerce
If you prefer to stay on WooCommerce, the same CLAUDE.md brief and step order still work. Claude can inspect and configure your store using WP-CLI and the WooCommerce REST API, and n8n has a built-in WooCommerce node for your workflows.
Another coding agent
You don’t have to rewrite your setup if you switch coding agents later. The brief file, the Shopify CLI commands and the prompts in this guide carry straight over to Codex, Antigravity CLI or Cursor, which Shopify’s AI Toolkit supports too.
Selling in more than one country
If you’re selling into more than one country from the start, Shopify Markets handles regional domains, local currencies and tax settings per market. Add your target markets to CLAUDE.md before Claude touches your tax or shipping screens, so every zone gets planned together.
FAQ
Why use Shopify instead of WooCommerce?
My first store started on WooCommerce, and I lost months to managing servers, chasing performance issues and blocking spam bots before rebuilding it on Shopify. With Shopify, hosting, checkout, security patches and uptime are Shopify’s job, and the Admin GraphQL API and Shopify CLI give Claude one clean way in. WooCommerce still works well for many store owners, and n8n has a native WooCommerce node if you already run there.
Can Claude set up a Shopify store on its own?
No. Sign-up, choosing a plan, activating Shopify Payments with your identity and bank details, registering for tax and copying API secrets are all yours to do. Once those are in place, though, Claude can handle most of the remaining settings, policies, smart collections and theme styling, with your OK at each step.
How is this different from Shopify’s AI store builder?
Shopify’s own AI tools are built to get a store looking good quickly. The Online Store page has a “Design your store in seconds” box that generates themes from a description of your business, and Sidekick in the admin writes content, changes theme settings and generates blocks for you to review. This guide does a different job: it sets up a store you’ll automate with n8n, built around your own product types, supplier feeds and API access, and you can still use Sidekick alongside it.
How much does it cost to start a Shopify store?
Not much to begin with. In the US, Shopify’s new-store offer is 3 days free and then US$1 a month for 3 months on Basic (US$39 a month after that, or US$29 billed yearly), plus Claude Pro at US$20 a month and a domain. The Horizon theme, the Shopify CLI, the Shopify AI Toolkit and the sales channel apps used here are all free, so you don’t need paid apps or a paid theme to launch.
Can I use this on a store I’ve already set up?
Yes. Write a CLAUDE.md brief for your existing store and start with the same read-only checks, so nothing changes until you’ve seen it. Have Claude audit your current product types, collection conditions and app scopes against the brief first, then approve the fixes one area at a time.
Next steps
With your store set up, your category tree in place and n8n connected, the next step is turning your first supplier feed into draft products. Head to Phase 1 on the series hub and follow the add products to Shopify automatically guide.